DIY Professional Blow-Out
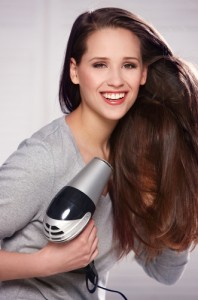
 For me, there is nothing better than getting your hair blown-out professionally. It’s just so relaxing, and no matter how many times I try to copy exactly what they do, it just never seems to come out the same. Well, here’s how to get a salon quality blow out at home. Before you start, you will need to get the right tools– brushes, product, clips and a hair dryer. If you are looking to achieve a blow-out with more volume use a round brush. It is important to use products with heat protectants– if you don’t, it’s like going out with out sunscreen. Try Oribe’s Creme for Style. This product loves straight and curly hair equally, has a UV protectant, will give you a firm yet flexible all-day hold and tames frizz with rich moisturizers. Clips for sectioning the hair, can be found at any drugstore, but my faves are the Colortrak Croc Clips. Elchim makes the best hair dryers. Elchim dryers are made with a Negative Ion Generating System which produces a continuous stream of ions, so drying time is reduced by 50% while hair remains smooth and shiny.
Work the product throughout the hair. It’s important to section off your hair for control. If you don’t have a lot of hair you can probably get away with 2 sections, but for those of you with a lot of hair you may have to do as many as 6. Many of us have little frizzy pieces in the front of our hair– this is where your blow-out should start. Take these little pieces and pull the hair tight, flat to your head. Use the dryer to get out any frizz you may have. Once you get all of those annoying small pieces in the front, move to the back. Start at the bottom and work your way up to the top, taking each section at a time. Hold the hair dryer above the hair and in the direction you want the hair to go. Take your time with each section. It can get tedious– but the end result is worth it. Think of it as a work out for your shoulders and arms! It’s important to get the root dry first, then work on the mid-shaft and ends. Spend an extra moment on the ends with your brush– allow the hair to cool for a second before dropping it from the brush and you will end up with a smooth result. Do the same thing at the nape of the neck as you did in the front. Smooth out the little pieces by pulling them tight and hitting them with the dryer. Once your hair is completely dry, you’ll want to smooth all the layers together in the back of your hair. Grab a section by the top, back part of your head. Comb that section together with your brush, hold your hair dryer above the section and pull the hair up and through the brush while drying in the same direction. This will meld all the layers together at one time and create a seamless effect. Spray a finishing shine all over (I love Gloss Defining by Davines). Make sure to hold the bottle 12 inches away from your head while spraying. Wha-la a DIY beautiful blow out!


