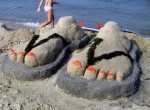
Sand Castle Battles
 Sandcastle contests showcase the work of elite sand sculptors from all over the world and novices. Many of the sculptors who participate in these contests have many years of experience and have won numerous local and regional contests to earn the chance to show their skills. Visitors to the festival can expect magnificent art that is truly transient. Only photos remain when the sculpture erodes.
 New Jersey Sandcastle Contest
July 18, 2012 Belmar, New Jersey; njsandcastle.com
Anyone can join in at this annual New Jersey event. Awards are distributed per age group and in day camp and family categories. If you prefer to simply observe the activities, there’s music, giveaways, and food.
 East Hampton Sandcastle Contest
August 4, 2012 Amagansett, New York; ehsandcastle.com
Participants are divided by age and experience level, with prizes and trophies awarded to the top three in all categories. Presented by local non-profit organization, The Clamshell Foundation, the money raised from the annual events goes to several charities.
 Nantucket Sandcastle Day
August 18, 2012 Jetties Beach, Nantucket, MA
Held every August, for the past 36 years at Jetties Beach, this late-summer ritual is a favorite among participants and sandcastle admirers. Each year, over 50 sculptures emerge from the sand, from families and teams vying for the top honors. The rules are simple – be creative! Highlights have included everything from Nantucket Lightship Baskets to VW Bugs.
 Tips & Tricks: 4 Rules of Castle-building
1)Use moist sand. Squeeze a ball of sand in your hand for a few seconds. If the ball stays together when you roll it around in your palm, it’s perfect sand for a castle. The best place to find this sand is below the tide line.
2) Start with a densely packed mound of sand. To get the best density, build up the mound gradually: Add 6 inches of sand, pack down firmly with your fists, then pour half a bucket of water on top. (You can never add too much water; any excess will just drain out.) Repeat until you’ve reached your desired height.
 3) Shave away sand in thin layers. This way, you’ll have more control when you’re carving design details. Plus, it’s easier to take away sand than it is to add it back.
4) Work from top to bottom. You’ll lessen the chance that falling sand or an ill-placed knee will ruin your work. As you create finer details like windows and stairs, blow away excess sand using a straw.


